Table of Contents
Zoho Extension : Shopify to Zoho CRM
Overview
This guide will help you set up the Shopify to Zoho CRM extension, enabling seamless synchronization of customers, products, and orders from your Shopify store to Zoho CRM.
Video Tutorial
Prerequisites
- Shopify Store with administrative access
- Zoho CRM Account with API access permissions
- Shopify Admin API Access Token with required scopes (see Step 2)
- Pop-up blocker disabled for this site (Zoho authentication uses pop-up windows)
Installation Steps
Step 1: Access Settings
Navigate to the Settings page in the Shopify to Zoho CRM extension dashboard to begin configuration.
Step 2: Connect Your Shopify Store
1. Enter Store Name: Input your Shopify store name only (without domain extensions)

- yourstore
- yourstore.myshopify.com
2. Generate Admin API Access Token: Create a token in your Shopify Admin with all required scopes
3. Click Connect Shopify Store button
Step 3: Map Accounts Module

- Navigate to Accounts Mapping section
- Map Shopify Customer fields to Zoho CRM Account fields
- Ensure customer data properly aligns with Account fields
- Click Save to store mappings
Step 4: Map Contacts Module
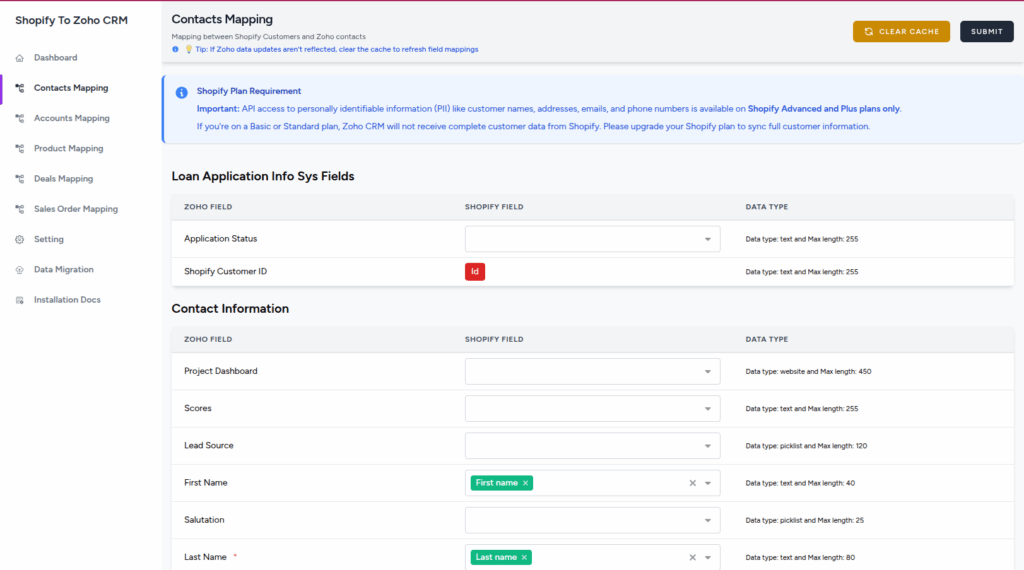
- Navigate to Contacts Mapping section
- Map Shopify Customer fields to Zoho CRM Contact fields
- Configure how contact information synchronizes
- Click Save to finalize Contact mappings
Step 5: Map Products Module
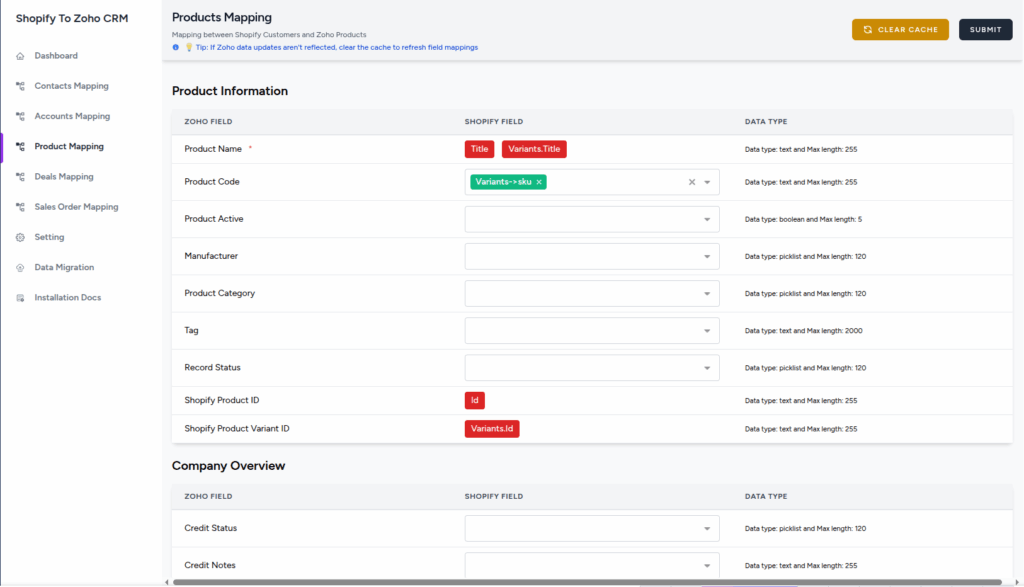
- Navigate to Product Mapping section
- Map Shopify Products to Zoho CRM Products module
- Configure product fields (name, SKU, price, etc.)
- Click Save after completing mappings
Step 6: Map Sales Orders Module
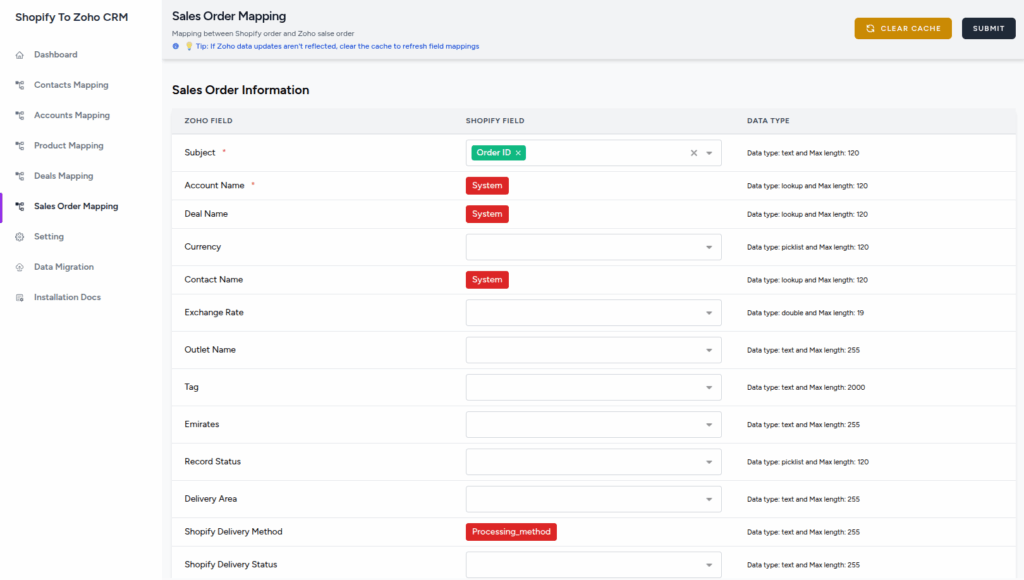
- Navigate to Sales Order Mapping section
- Map Shopify Orders to Zoho CRM Sales Orders module
- Configure order data fields (customer, status, products)
- Click Save to finalize Sales Order mappings
Step 7: Test Integration
- Trigger a test synchronization or wait for automatic sync
- Verify data in your Zoho CRM account
- Check that customers, products, and orders synced correctly
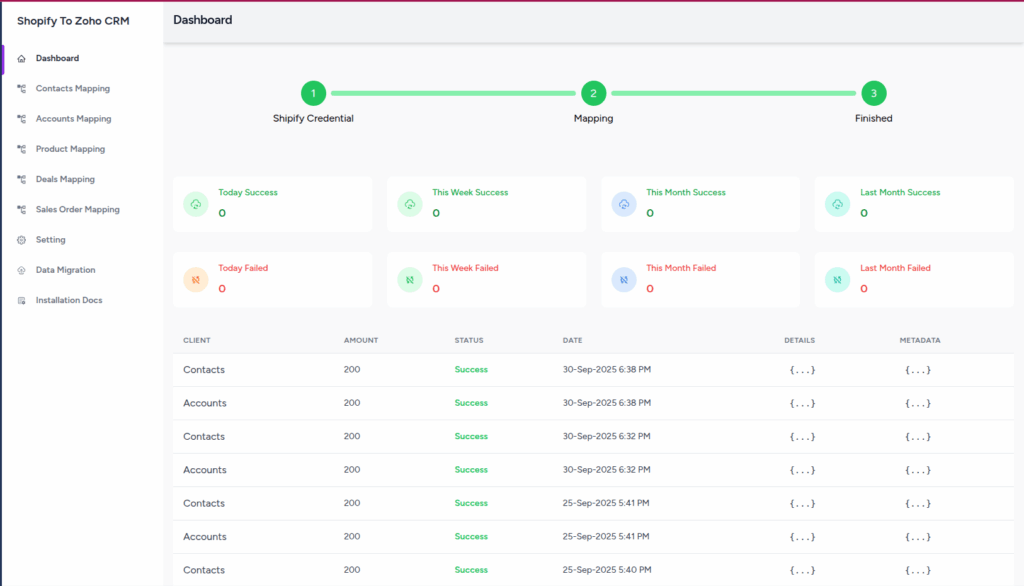
- Monitor sync status on the Dashboard
Step 8: Data Migration (Optional)
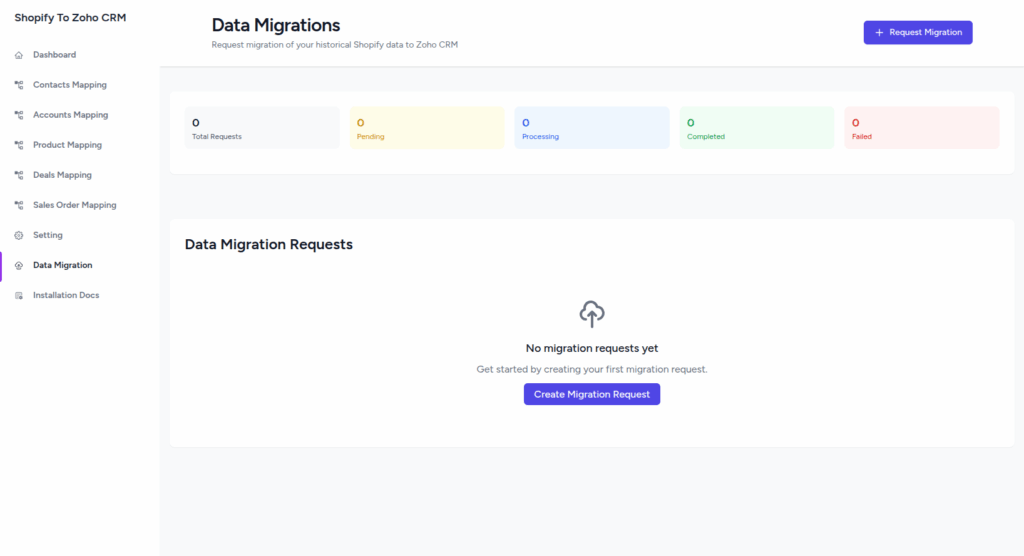
If you need to migrate historical data from Shopify to Zoho CRM:
- Navigate to Data Migration section
- Select migration type (Old Data, Partial, or Full)
- Choose modules and date ranges
- Submit migration request for processing
⚠️ Important Notes
🔧 Troubleshooting
Pop-up blocked during authentication
Check your browser’s address bar for a blocked pop-up icon and allow pop-ups for this site. Try the connection again after allowing pop-ups.
Customer data not syncing completely
Verify your Shopify plan. Full customer PII requires Shopify Advanced or Plus plans. Basic/Standard plans have limited customer data API access.
Cannot map Sales Orders
Ensure Account mapping is completed first. Sales Orders depend on Account data and will show a warning if Account mapping is missing.
API token errors
Verify your Shopify Admin API token has all required scopes and hasn’t expired. Generate a new token if needed with proper permissions.
💬 Need Help?
If you encounter any issues during installation or have questions about the integration, our support team is here to help.
Email Support: